Requests
JetClient allows you to create three types of requests:
- Draft Requests: Temporary requests stored in the Drafts folder for quick API calls.
- Regular Requests: Organized within folders to structure your API calls.
- Example Requests: Child requests of a regular request. See Examples for details.
Draft Requests
Draft requests are a way to quickly create requests without assigning them to a specific folder or collection.
To create a draft request:
- Press
Alt + Shift + D. - Alternatively, click New | Draft in the JetClient tool window toolbar.
The draft request will appear in the Drafts folder, and the request editor will open automatically.
Regular Requests
To create a regular request:
- Open the context menu of a folder and select New | Request.
- Enter a Name and an optional Description (displayed next to the name in the folder tree).
- The request editor will open automatically.
Request Editor Overview
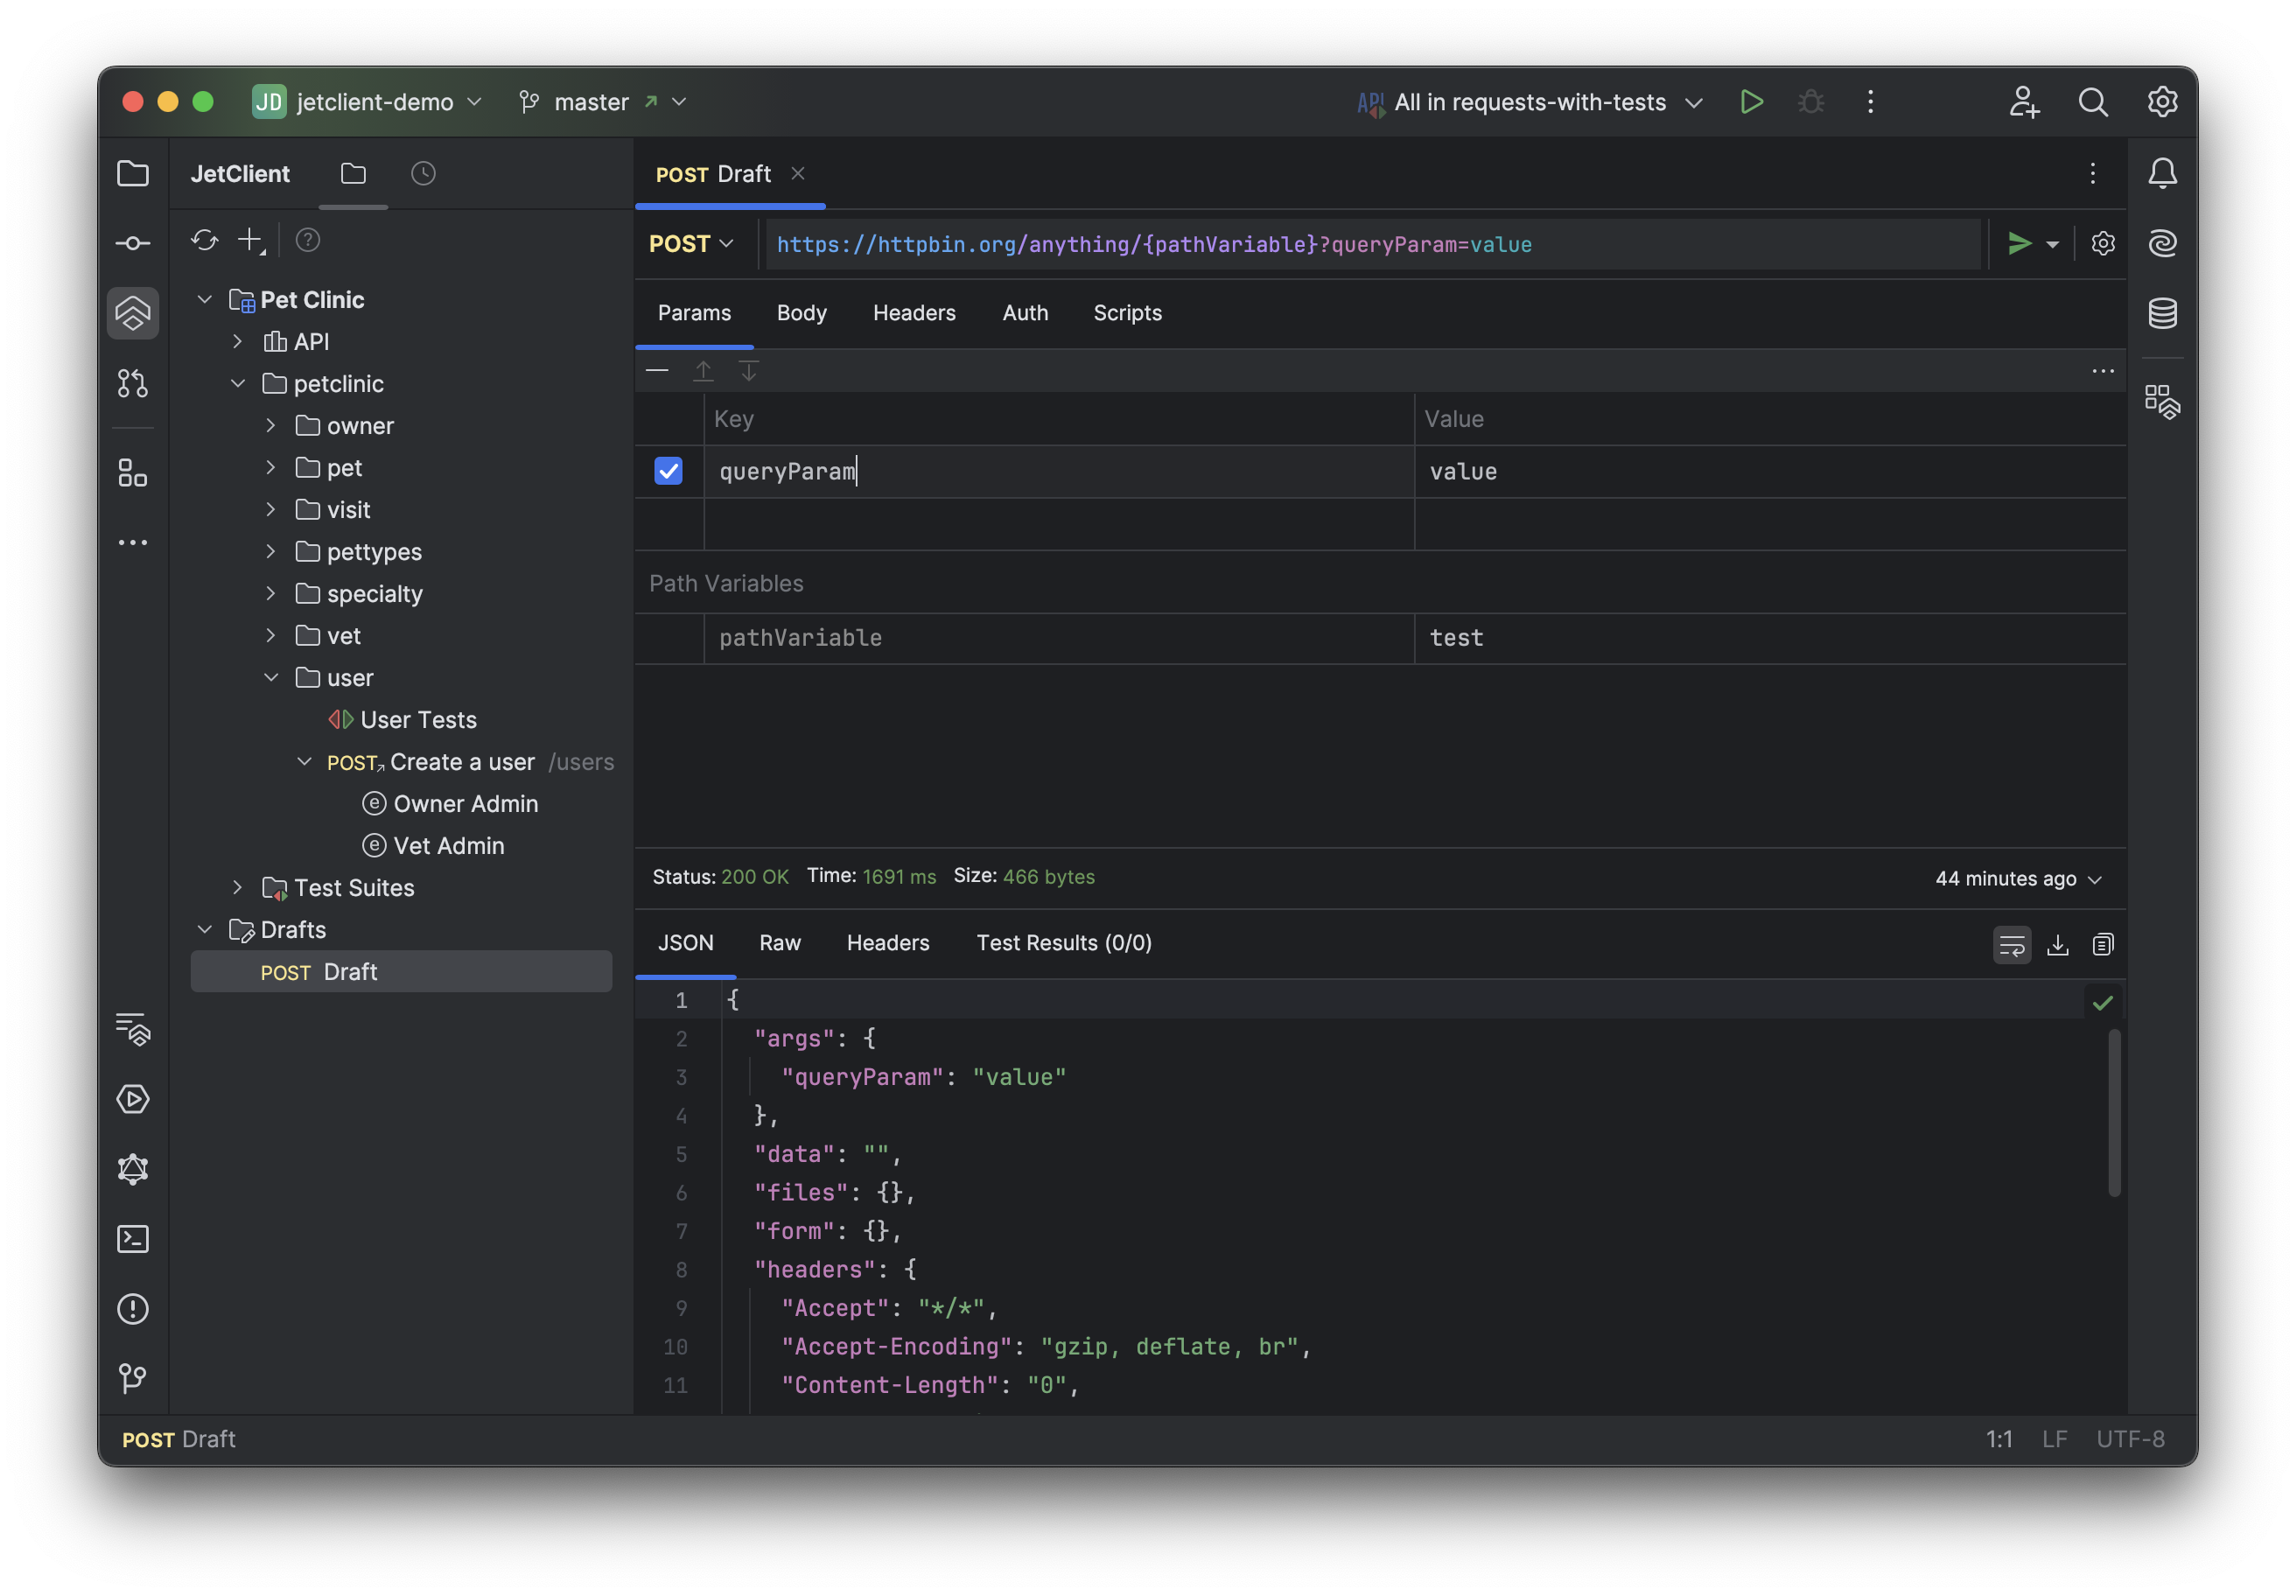
The request editor is divided into three main sections:
URL Bar
Located at the top of the editor, the URL bar includes:
- HTTP Method Dropdown: Select the HTTP method (e.g., GET, POST).
- URL Field: Enter the request URL.
- Send Button: Execute the request.
- Send Button Dropdown: Access options like sending and downloading the response.
- Settings Button: Configure the orientation of the request and response panels.
Request Panel
The Request Panel provides several tabs for configuring the request:
- Params:
- Specify query parameters and path variables.
- Query parameters can be added directly in the URL or in the table, and they sync automatically.
- Path variables can be defined in the URL using
{pathVariable}or:pathVariable. Their values can then be set in the automatically generated path variable table.
- Body: Configure the request body with the following supported types:
- No Body
- Plain
- JSON (supports JSON5 syntax that converts to JSON when sending the request)
- HTML
- XML
- Multipart Form
- Form URL Encoded
- GraphQL
- Binary File
- Headers: Add custom headers or view headers inherited from parent folders or the project.
- Auth: Configure authentication settings. See Auth for more details.
- Scripts:
- Pre-request Script: Executed before sending the request.
- Post-response Script: Executed after receiving the response. See Scripting for more details.
At the top-right corner of the Request panel, you’ll find the active environment dropdown, allowing you to select the environment to use when sending the request.
Response Panel
The Response Panel displays the results of the request and includes the following tabs:
- Preview: Renders HTML responses in a built-in browser.
- Formatted View: Displays JSON, XML, or other supported formats with syntax highlighting.
- Raw: Shows the raw response content.
- Headers: Lists response headers.
- Test Results: Displays results of test scripts executed on the response.
Executing a Request
To execute a request:
- Press
Cmd + Enteror click the Send button. - To send the request and download the response click the dropdown arrow next to the Send button and select Send and Download, or press
Cmd + Shift + Enter.
